
Error Prevention Toolkit methods give teams a shared language to anticipate risks, catch slips in real time, and escalate concerns before harm occurs.
When applied consistently—from bedside to back office—these techniques convert safety from an abstract value into daily habits.
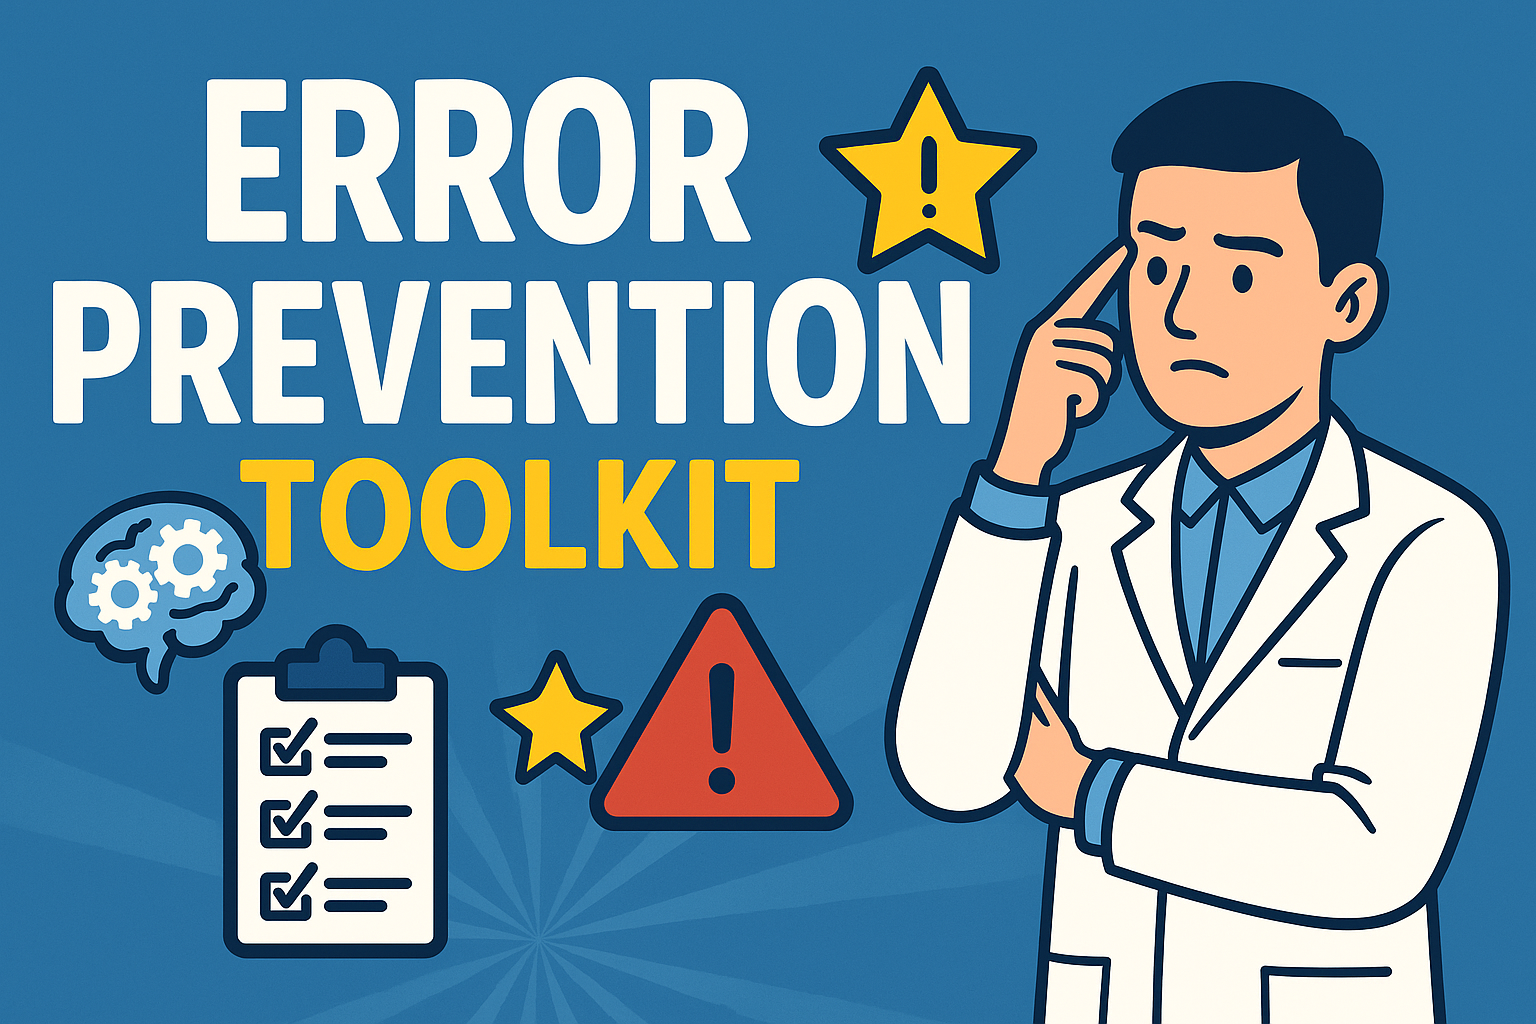
Below is a practical, step-by-step guide to implementing an Error Prevention Toolkit in any clinical or high-risk environment, with examples you can start using on your next shift.
- Why an Error Prevention Toolkit works
- Core behaviors inside an Error Prevention Toolkit
- Expanding the Error Prevention Toolkit with high-yield practices
- How to implement the Error Prevention Toolkit in 30 days
- Common pitfalls—and how to avoid them
- Quick reference: the mini Error Prevention Toolkit
- Bringing it all together
Why an Error Prevention Toolkit works
An Error Prevention Toolkit reduces variability in how people communicate, verify, and recover from distractions. Instead of relying on memory or “common sense,” you standardize safety behaviors that trigger the same reliable outcome under stress.
The toolkit also builds psychological safety: anyone can pause, question, and escalate without fear of being labeled difficult.
Core behaviors inside an Error Prevention Toolkit
1) STAR (Stop–Think–Act–Review)
A micro-pause that lasts 2–5 seconds but averts hours of rework.
How to use: Before starting a high-risk step—labeling a specimen, administering a med, turning off an infusion—stop and name the intent (“I am drawing a lavender-top for CBC”).
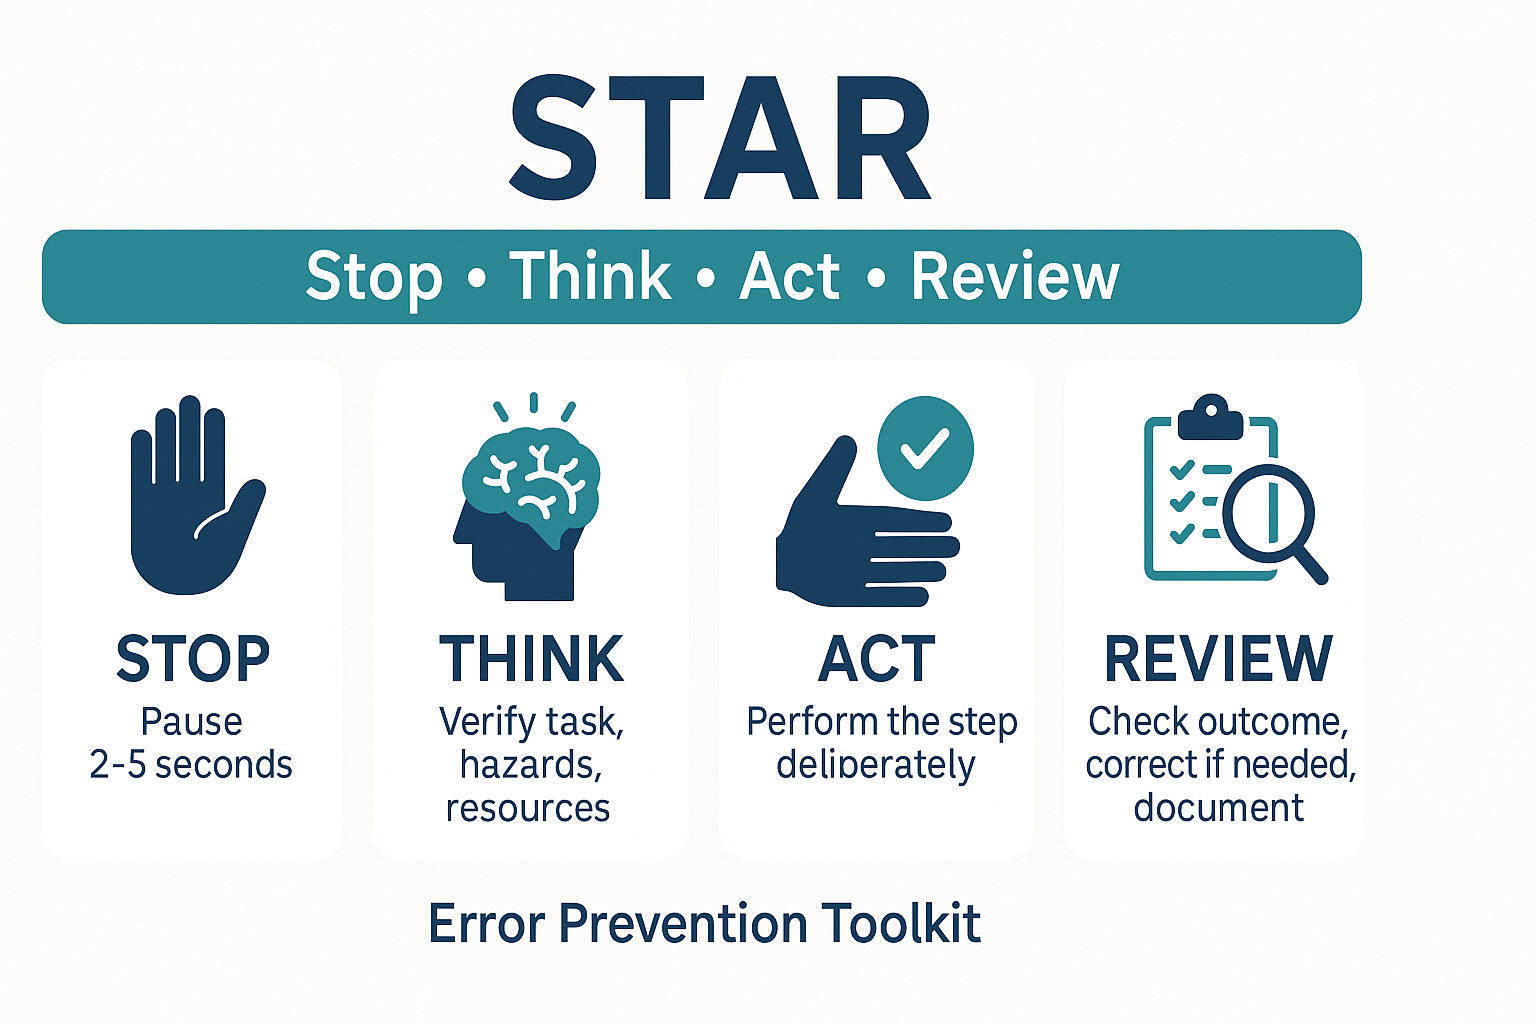
Think through hazards, act deliberately, then review the outcome (“Label matches order and patient”).
Where it helps most: Labeling, dosing, entering orders, switching devices, and during handoffs when interruptions are likely.
2) 3-way repeat-back & read-back
Closed-loop communication that verifies what was sent is exactly what was received.
How to use: Sender gives instruction → receiver repeats it verbatim → sender confirms or corrects. For verbal orders, include a read-back of the complete content, numbers, and units.
Pro tip: Write it down while repeating to create a second memory trace and reduce digit transposition.
3) Clarifying questions
Ambiguity is a defect.
How to use: Ask one to two targeted questions anytime something “feels off”: “Do you mean IV push over 5 minutes or start an infusion?” “Which side are we prepping?”
Behavioral cue: If you are guessing, you should be clarifying.
4) Phonetic alphabet & speak-up numbers
Numbers and spellings fail under noise.
How to use: “That’s order B as in Bravo, patient in Room one-three, dose one-five milligrams—one-five.”
Bonus: For high-risk values (e.g., potassium), repeat the number, unit, and route.
5) SBAR for concise escalation
Situation, Background, Assessment, Recommendation turns rambling updates into action.
How to use: “Situation: post-op day 1 with rising pain.

Background: spinal block wore off early. Assessment: vitals stable; pain 8/10.
Recommendation: request review for rescue analgesia and antiemetic now.”
When to use: Handoffs, pages, consults, and any time clock time matters.
6) Question & confirm
Treat every critical step like a hypothesis.
How to use: “Is this the latest order set? Confirm with the MAR and patient ID.” Create a habit of pairing a question with a second source (device screen, patient wristband, printed label, or a colleague).
7) ARCC: Ask, Request, Concern, Chain of command
A respectful, graded assertiveness script.
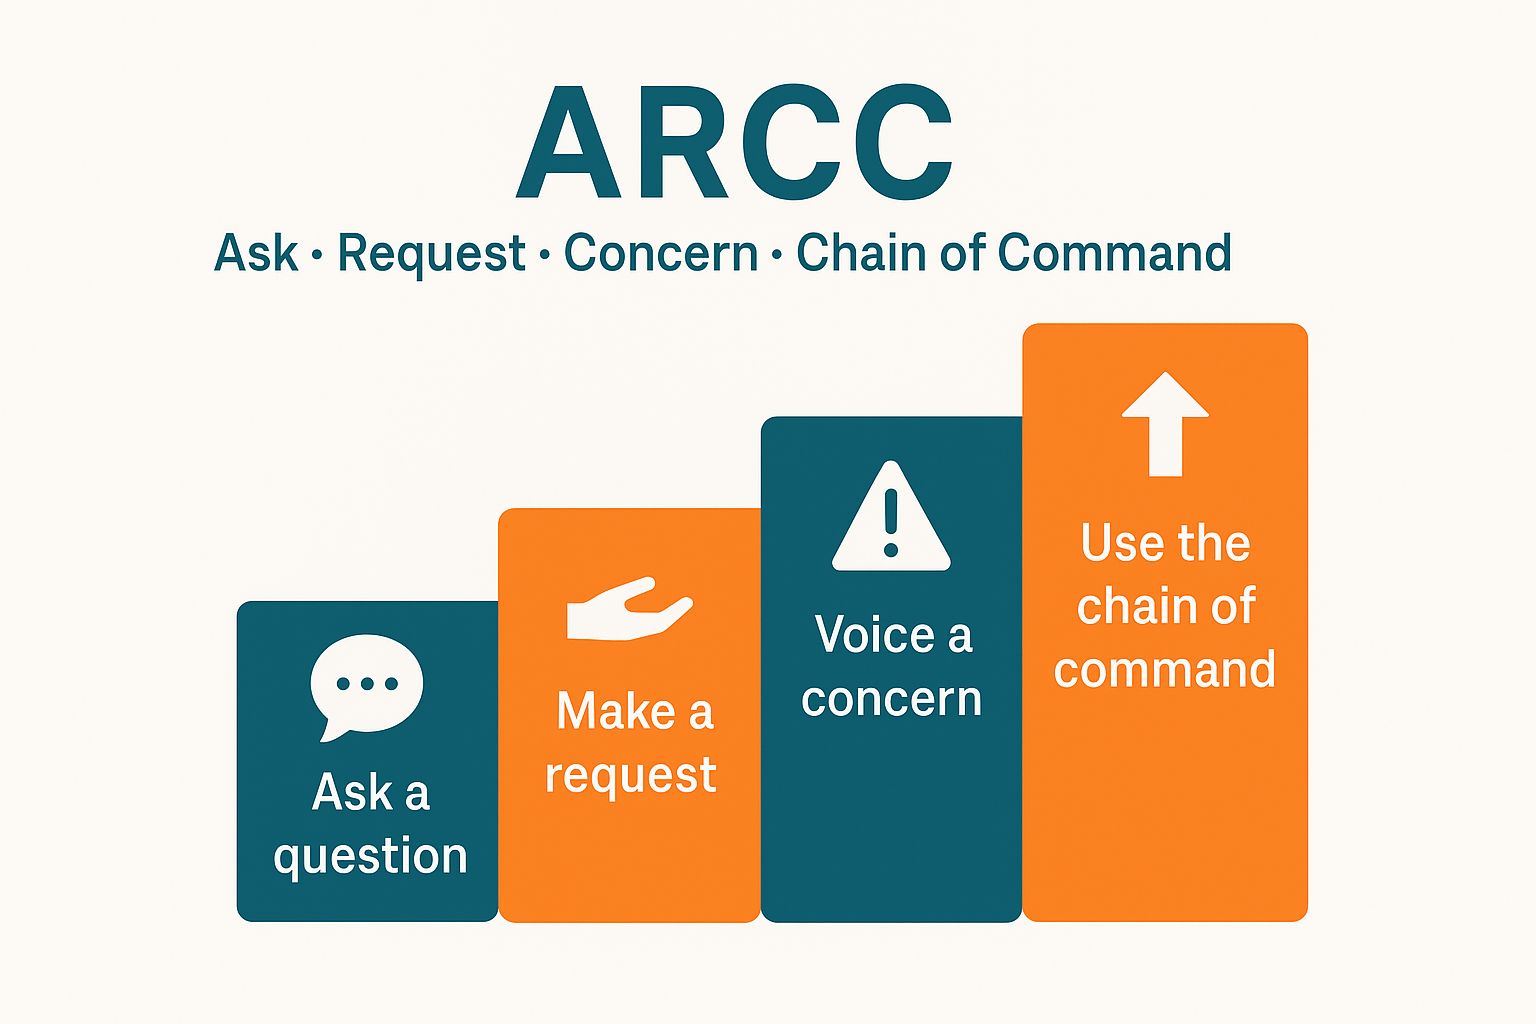
How to use:
- Ask a question: “Can we pause? I’m not seeing the allergy band.”
- Request an action: “Please hold the med until we verify.”
- State a Concern: “I’m concerned about a potential penicillin allergy.”
- Call the Chain of command if unresolved.
Practice it in huddles so it feels natural during real events.
8) Cross-check & peer coaching
Shared vigilance catches what individual attention misses.
How to use: Partners verbally check each other’s critical steps: labels, site/side, pump rate, syringe concentration. Encourage live coaching: “Let’s STAR this before we connect.”
9) 5:1 feedback ratio
Reinforce the behaviors you want repeated.
How to use: For every corrective note, deliver several specific positives (“Nice closed loop on that order; clear SBAR.”). This keeps coaching safe, frequent, and welcomed.
Expanding the Error Prevention Toolkit with high-yield practices
Standardized checklists and “red rules”
Checklists reduce reliance on memory; red rules define the never-events (e.g., no unlabeled syringes). Place short, role-specific checklists at the point of use—on carts, pump docks, or scanners—and rehearse them during orientation and simulation.
Time-outs and “sterile cockpit”
Borrowed from aviation, a time-out before invasive or high-risk tasks confirms identity, site/side, allergies, equipment, and imaging.
A sterile cockpit period forbids unrelated chatter during critical windows (e.g., med compounding, order entry).
Visual controls & poka-yoke (error-proofing)
Color-coded caps, unique connectors, barcode-scan gates, and forced function forms prevent mix-ups. If two items look similar, add a bold visual tag or place them in separate bins with tall dividers.
Daily safety huddles
Ten minutes that change a shift.
How to use: Review yesterday’s risks, today’s staffing and patient acuity, new equipment, and one Error Prevention Toolkit behavior to spotlight.
Track action items on a simple board so issues don’t vanish.
For a template, see a brief guidance from the Institute for Healthcare Improvement (IHI) on safety huddles (helpful background: IHI).
Near-miss reporting & learning loops
Near misses are free lessons—if you capture them. Keep reporting simple (QR code + 1-minute form), close the loop with visible fixes, and celebrate reporters.
Good overviews on building learning systems are available from the Agency for Healthcare Research and Quality (AHRQ) and its Patient Safety Network.
Just culture & psychological safety
A just culture distinguishes human error, at-risk behavior, and reckless behavior, focusing on system fixes and fair accountability.
When staff trust the response, they use the Error Prevention Toolkit instead of hiding mistakes. The Joint Commission’s resources on high-reliability and just culture provide practical starting points (Joint Commission).
Cognitive aids & pocket cards
Provide quick-grab guides for dosing ranges, reversal agents, sepsis bundles, and emergency checklists. Pair the cards with QR codes linking to the latest protocol to avoid outdated copies.
Simulation, drills, and onboarding
Short, scenario-based drills convert the Error Prevention Toolkit from theory to muscle memory. Focus on communication under stress, alarm floods, and equipment swaps. Embed these drills in onboarding and annual refreshers.
Digital safety nets (with human oversight)
Smart EHR defaults, dose range checks, and barcode scanning catch many defects—but over-alerting leads to blind clicks. Regularly review alerts, retire noisy ones, and reinforce that people remain the last line of defense.
How to implement the Error Prevention Toolkit in 30 days
Week 1 — Pick & pilot.
Choose 3–4 behaviors (STAR, 3-way repeat-back, SBAR, ARCC). Build pocket scripts, stickers, or tiny desk cards. Introduce them in a brief huddle and model them visibly.
Week 2 — Hardwire in workflows.
Add cues where the behavior should trigger: labels on pumps (“Pause for STAR”), SBAR fields in handoff notes, repeat-back boxes in order forms, and ARCC ladder posters at workstations. Link to your local quick guides (e.g., /safety-huddle-template, /sbart-cheat-sheet).
Week 3 — Coach & measure.
Leads and preceptors observe for 10–15 minutes daily, offering 5:1 feedback. Track two simple metrics: “% of high-risk steps with closed-loop communication” and “# of near-misses reported.”
Week 4 — Expand & celebrate.
Add cross-checks and a sterile-cockpit rule for one high-risk task (e.g., chemo mixing). Share two stories where the Error Prevention Toolkit prevented harm. Public wins normalize the new standard.
Common pitfalls—and how to avoid them
- Too many tools at once. Start small; master a few behaviors before adding more.
- No visible leadership use. Staff mirror what leaders do. Charge nurses and physicians should model SBAR and ARCC on rounds.
- Clunky documents. If a checklist takes longer than the task, people will skip it. Trim to essentials and put it where the work happens.
- Muted feedback culture. Pair coaching with appreciation. The ratio matters.
- Outdated materials. Set a quarterly review to retire old posters and update QR links.
Quick reference: the mini Error Prevention Toolkit
- STAR before any irreversible step.
- 3-way repeat-back for verbal orders, high-risk numbers, and handoffs.
- Clarify any ambiguity—never guess.
- Phonetic alphabet & speak-up numbers for names, rooms, and doses.
- SBAR for concise escalation.
- Question & confirm with a second source.
- ARCC to assert respectfully and escalate early.
- Cross-check peers on labels, rates, and sites.
- 5:1 feedback to hardwire habits.
For more depth on these fundamentals, see overviews from AHRQ’s Patient Safety Primer and practical tools at the IHI’s patient safety resources.
Both are clear, actionable starting points for teams building or refreshing their programs.
Bringing it all together
The Error Prevention Toolkit is not a poster; it’s a set of behaviors you can see and hear on the floor—pauses before high-risk steps, crisp repeat-backs, respectful challenges, and quick coaching.
Start with a few core tools, embed them into everyday work, and celebrate small wins. When everyone knows the script, catching errors becomes routine—and patients feel the difference.
No comments yet